Making skin for CS:GO
Download resources
-
Download CS:GO Workbench materials UV sheets, models and examples from official site
-
Download VTF Edit, to convert TGA results into VTF format: https://github.com/NeilJed/VTFLib/releases
Create the project
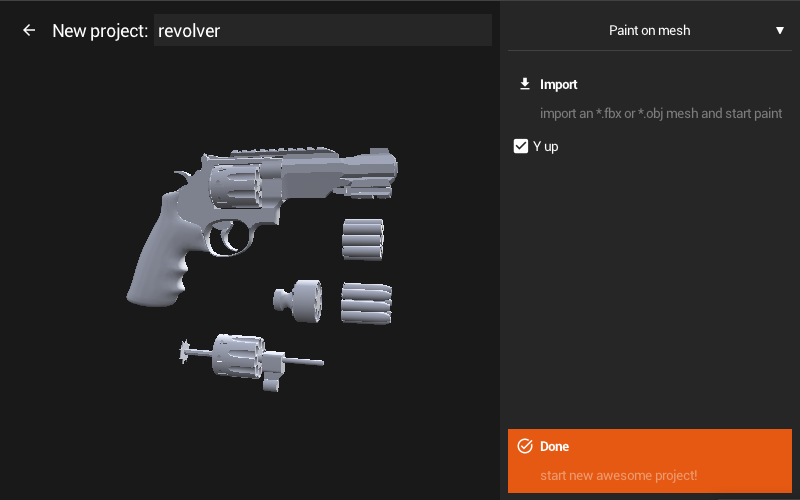
Create new project and import model from CS:GO Workbench materials
Paint your model

Paint your model as you want, but remember a few things:
- In CS:GO, you can only export albedo and normal layers.
- Some weapon parts, such as bullets, cannot be edited. You can modify them in the app and export the result, but the default skins will override your changes.
Export the result into steam
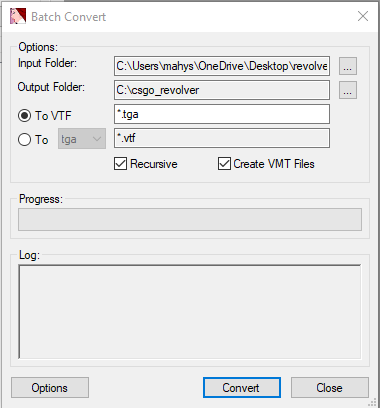
- Export albedo and normal as TGA images.
- Convert with TGA images into VTF format with VTF EDIT
- Run VTF EDIT
- Select
Tools->Convert Folder - Chose folder with TGA images as
input folder - Make output folder as you want. It may be the same folder, or another one.
- Make sure To VTF is checked
- click
Convert. It will generate VTF files in your output folder
Test the result with workbench
- Run CS GO
- Open console by pressing
~(if it doesn't happen, turn on console inSettings->Game Settings->Enable the console) - Type
workshop_workbenchand press enter
Setup the skin into workbench
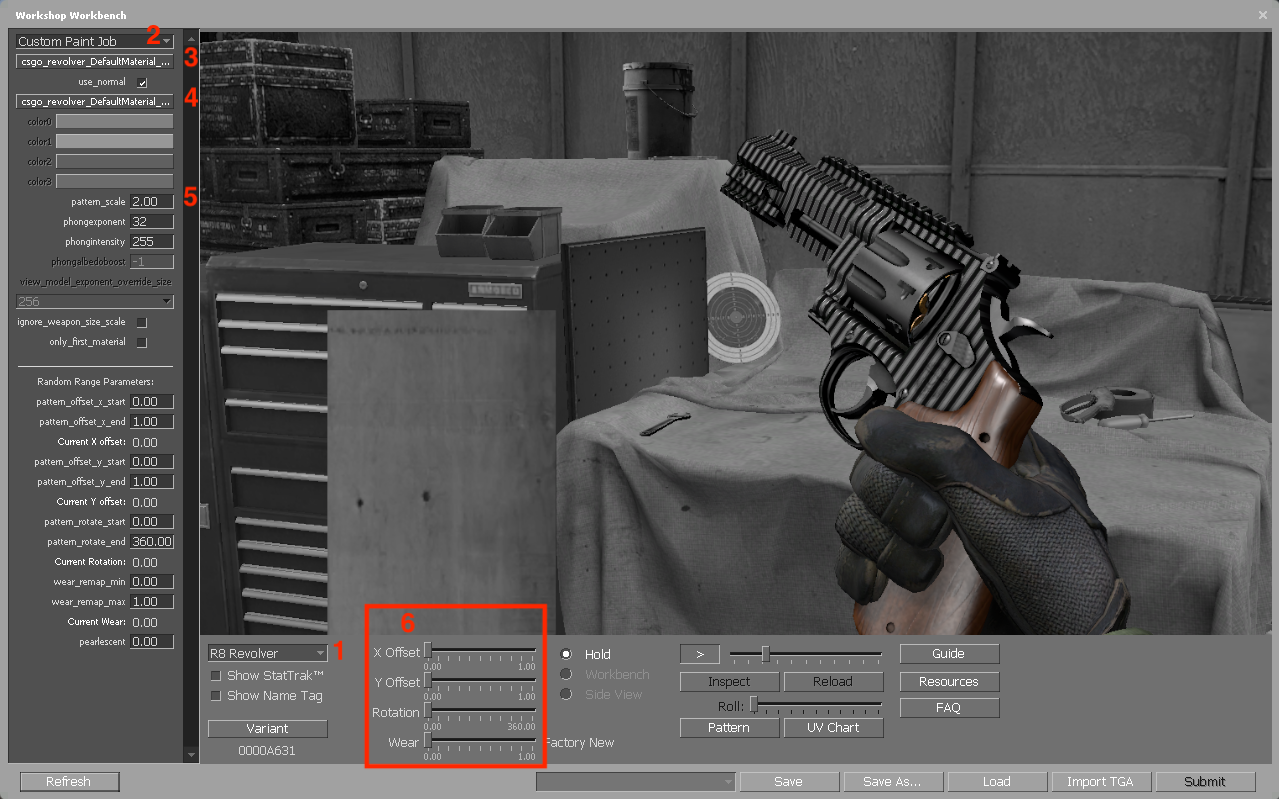
- Choose your weapon
- Choose a custom paint
- Load UV sheets for albedo
- Choose use_normal and load UV sheets if you have it
- Set pattern_scale as 2.0
- Set X offset, Y offset, Rotation and Wear to 0
Here you can look at your skin in the game, watch reload animation, etc.
Whats next?
You can test your skin in the game by changing game files and publishing it to the community. However, this not concern working with the Agama materials, so we cannot provide any specific recommendations in this regard.
Instead of it, we recommend you read this arcticle about the submission process and Marketing.